Facebook Groups are an effective way to create a community, drive engagement, and improve customer relations for your brand or business.
While Facebook Pages can sometimes feel like a one-way channel for brands to share updates, Facebook Groups are a space for users to connect and communicate with like-minded people about shared interests.
Ready to build a successful Facebook Group for your business? We’re covering everything you need to know in this blog post!
Table of Contents:
What are Facebook Groups
If Facebook Pages are the business equivalent of a “Facebook Profile”, Facebook Groups are the best place to encourage conversations and interactions from your community.
Facebook Groups can also be affiliated with Pages, so any Group you create can be added as an extension to your official Facebook Page.
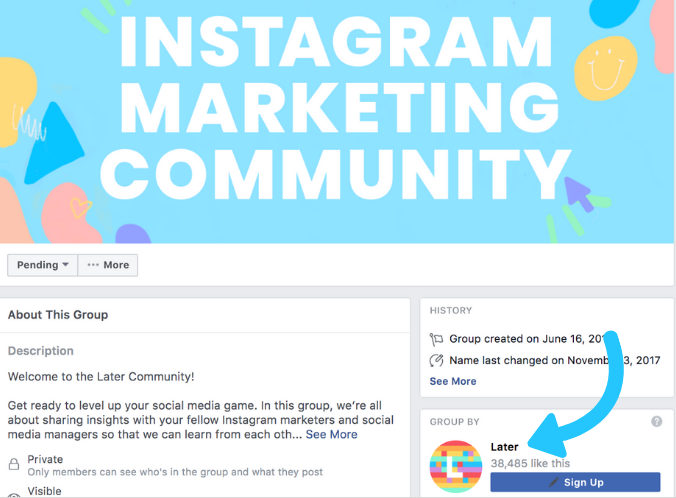
Essentially, when you create a Facebook Group, you’re giving your fans a place to come together to discuss specific topics, organize activities, post photos, express their ideas and opinions, and connect with each other to communicate shared interests.
And while only official brand owners or admins can create Facebook Pages, anyone can create a Facebook Group.
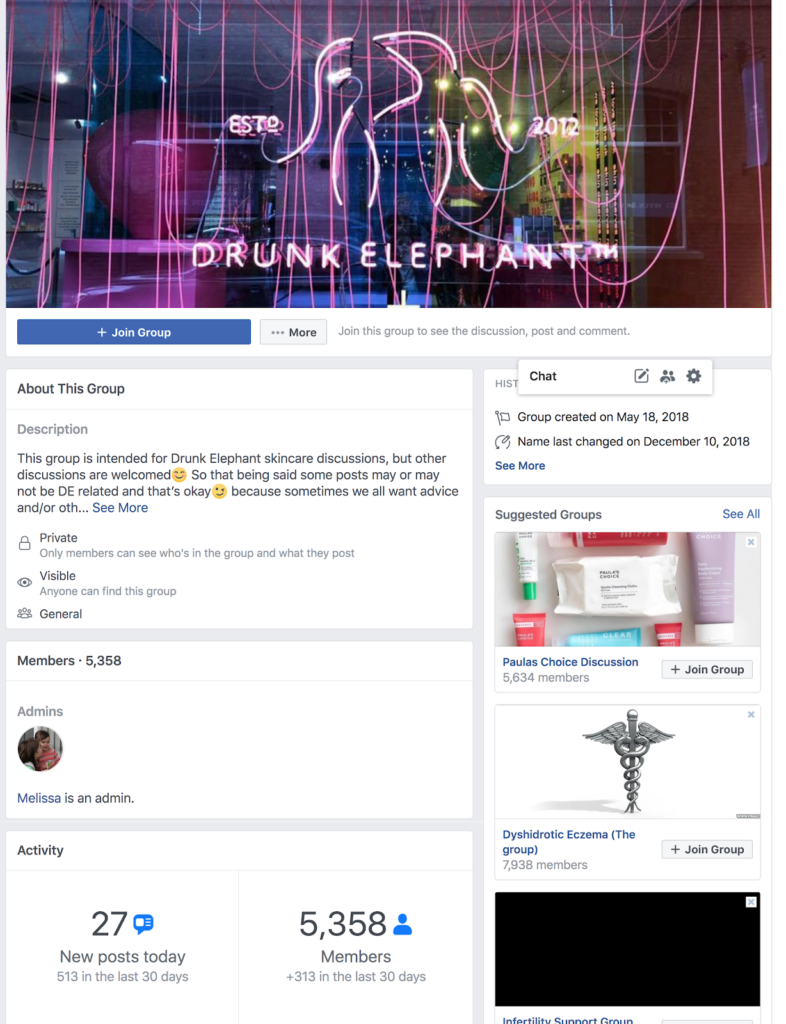
For example, fans of skincare company Drunk Elephant created a group called Drunk Elephant Skincare Addicts, where its 5.3K members can share their beauty routines and discuss anything and everything related to Drunk Elephant:
TIP: If you discover that fans or loyal customers have already created Groups related to your brand, request to join and actively engage in relevant conversations!
However, it’s always a good idea to manage your own Facebook Group, even if several Groups related to your brand already exist.
As the owner of a Facebook Group you gain access to Activity insights, can control the Group settings and privacy controls, and most importantly, you have the authority and control to moderate conversations as a Group Admin.
Looking to level-up your Facebook strategy? Plan, schedule, and post to Facebook with Later — for free!
NOTE: At the moment, it’s not possible to schedule posts with Later to Facebook Groups (but don’t worry, we’re working on it!)
Why Create a Facebook Group for Your Business
Facebook Groups provide a whole set of unique benefits that help your brand stand out from the crowd. In summary, Facebook Groups allow you to:
Own a space where direct, two-way communication can occur between you and your customers
Control who is part of your community and create a safe space
Monitor audience sentiment
Respond to queries and deescalate issues
Build communities around certain topics or events related to your brand, or even location-based groups
Get a better of understanding of your audience demographic and what they care about
Identify new target audiences for product and marketing campaigns
Gain valuable and honest feedback
Facebook used to mainly focus on showing users the most relevant content from businesses, brands, and media. But now, one of Facebook’s main focuses is to help users have more meaningful social interactions.
This is where Facebook Groups come into play.
Since Facebook encourages (and even favors) the social interactions happening in Facebook Groups, it means that group activity is much more likely to be surfaced in members’ News Feeds and notifications than a static post from a Facebook Page would.
How to Set up a Facebook Group
Setting up a Facebook Group for your brand or business is easy and can be done in just a few steps:
Step #1: Create Your Facebook Group
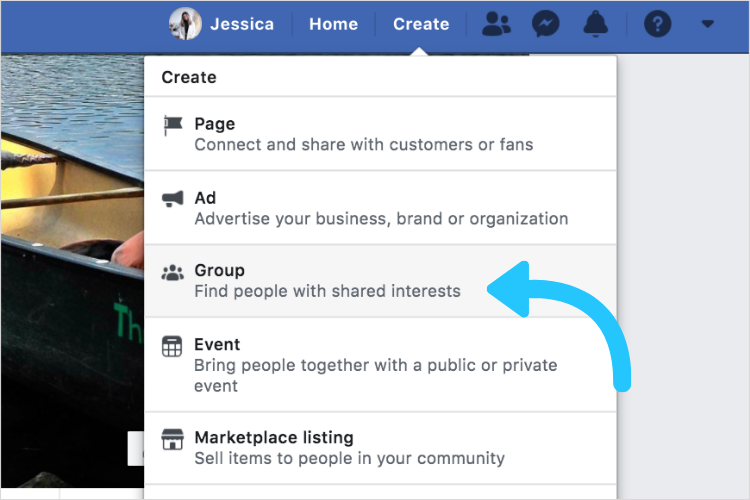
After logging into your Facebook Page, find the “Create” tab in your navigation bar and select “Group” from the drop-down menu.
Step #2: Name Your Facebook Group
When deciding on a name for your group, choose something that clearly conveys what the group is about and how it relates to your brand.
Remember that when it comes to creating groups, the world is your oyster. You really can make a group for anything, but it’s worth making sure it’s relevant to your business in some way.
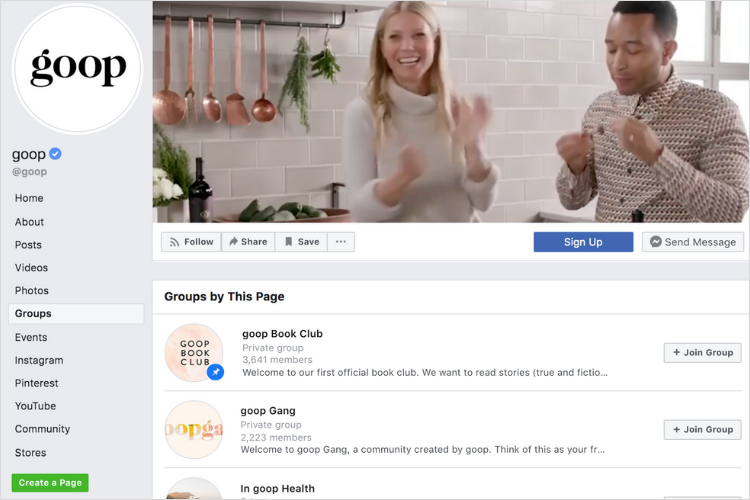
For example, you could create a group dedicated to a certain product line or thread of discussion, like goop does for goop Book Club:
Step #3: Invite Members to Join Your Facebook Group
Next, you can invite people to join your group! You can enter either email addresses or Facebook names here.
Facebook users are more likely to join groups that already have some members. Bump up the numbers by inviting your friends and coworkers to join the group first.
Next, invite the users who already like and engage with your brand. Invite subscribers from your newsletter list, fans of your Facebook Page, and promote your new Facebook Group on your other social platforms like Instagram!
TIP: Give the invitation to join your group a more personal touch by writing a quick note. You can use this space to explain why you’ve created the group, why invitees should join, and what they can expect to see from the group in the future!
Step #4: Make Your Facebook Group Public or Private
In terms of privacy, Facebook Groups has two options: public or private.
Choosing to create a private or public Facebook Group depends on what your goals are. If you’re looking to create an intimate and personal space with your community, opt for a private group. But, if you’re looking to bring as many users together as you can, making it public may be your best option.
When your Facebook Group is public, like this community group by Tasty, it’s visible to anyone, and any user can join it without asking for permission:

Additionally, browsers can peruse all posts within the group, even without selecting to become a member. If your goal is growth, this can be a good thing! Since browsers can view everything in the group, they’re more likely to join after clicking around a bit to see what goes on. Thus, public groups tend to grow faster than private ones.
While private groups appear in search, and their “About” sections and members are visible to anyone, the content and posts within these groups are only accessible to members. For someone to join the group, their request has to be accepted by an existing member or group administrator.

Private groups are great for creating a sense of community and exclusivity for your most dedicated fans. They are a place for conversations or feedback from hand-selected members
Architectural Digest has a group called AD PRO: Conversations and Connections for Designers, which serves as a place for AD PRO members. Here, members find a safe space for sharing work, contacts, interacting with the AD PRO editors, and hearing/sharing opinions with interior designers around the world:

After you pick your privacy level, you can go ahead and click “Create.”
TIP: You can opt to make sure only members can find your group, rather than having it appear publicly in search, by selecting “Hide group” in your Privacy settings.
Step #5: Add Detail to Your Facebook Group
Now you’ve created your group, it’s time to add the all-important details. This will help set the tone and purpose for your group.
Customize your new Facebook Group by:
Add a Cover Photo
The more specific, the better! Your cover photo should make it clear that the group belongs to your brand.
Ideal dimensions for a cover photo are 820 pixels wide and 312 pixels tall for desktop, and 640 pixels wide by 360 pixels tall for mobile.

TIP: Use your Facebook Group cover photo as a promotional opportunity! See how the Ladygang podcast uses their Facebook Group cover photo to promote their book release.
Write a Description
The group description will appear in the “About” section, and will be visible to everyone.
Make sure your description is clear, catchy, and conveys what the group is all about! This is a good place to include group rules/guidelines, or more information on the group admins, like National Geographic does on their Women of Impact group description:

Include Tags
When you add tags to your Facebook Group, they work as keywords to help your group appear in search as well as Facebook’s “Suggested for You” and “Categories” sections on the main Groups page.
Set a Location
If your group is intended to be for a specific area or city, set a specific location.
Step #6: Share Your First Post
Finally, it’s time to get the party started yourself! Publish a post to your group that prompts members to like and comment, and ask your friends and coworkers to get involved for an extra engagement boost. Your first post could ask where everyone is from, how they found the group, and what they hope to get from joining the group.
It may take a while to get the ball rolling, but regularly posting and encouraging interactions will soon encourage members to get involved and start sharing their voice.
Now you’re on your way to building an incredible community! Online communities are an incredible tool for your business, no matter which social platform you’re on.
Like Facebook communities, building a community on Instagram is one of the best ways to boost engagement and stay connected to your customers.
Looking to build a strong community on Instagram? Check out our blog post on how to do just that.
6 Tips to Optimize Your Facebook Group for Business
Having a thriving community in your Facebook Group isn’t just about driving customer loyalty and sales. Brands with strong Facebook Group communities are often the most attuned to what their audience wants, who they are, and how to add value to their lives.
Ready to start building a Facebook community? Here are our 6 top tips to help you get started:
Tip #1: Engage with Your Group Regularly
As your group continues to grow, members will start driving discussions on their own!
But instead of taking the back seat and just observing conversations, you should also engage with your members’ posts. Spark new conversations in the comments of an existing post or contribute to discussions that are already happening.
It’s also a great place to offer help and support to your users and customers:
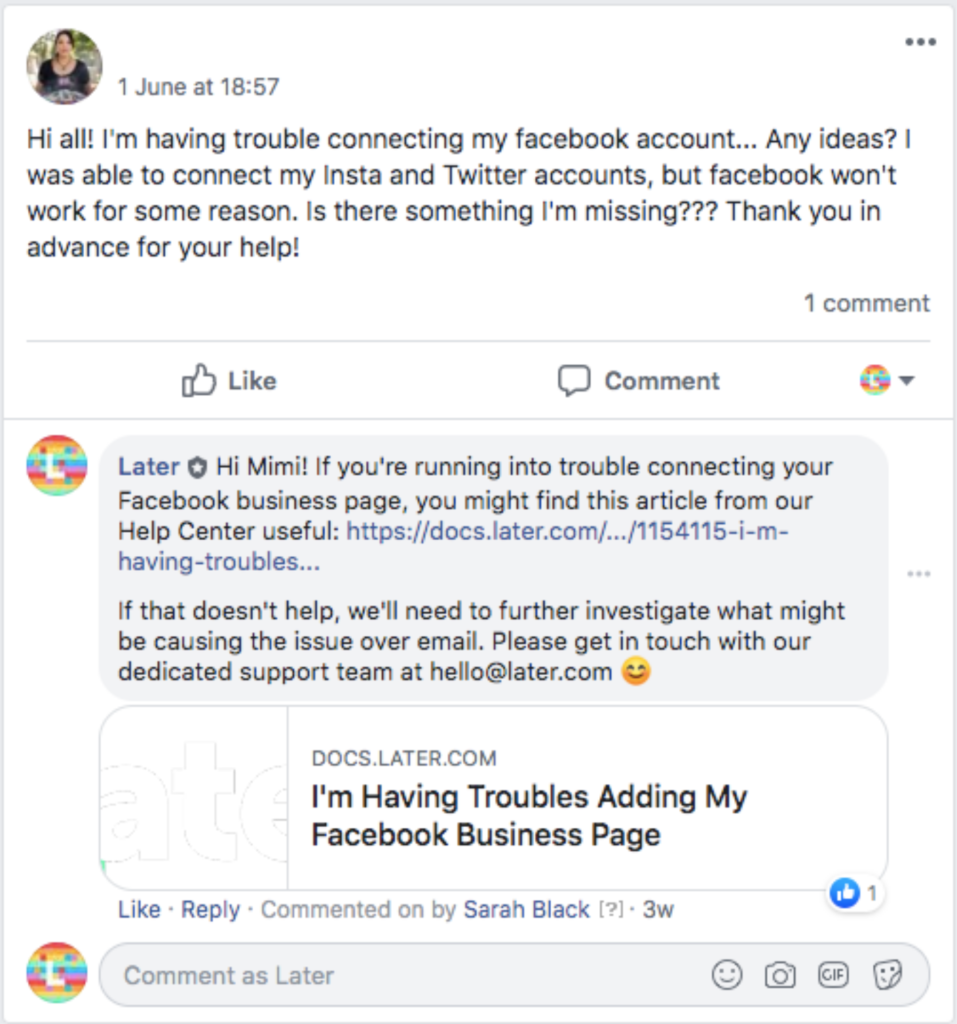
Don’t forget that you made your Facebook Group to lead conversations and communicate directly with your community. Reply to questions, drop encouraging comments, welcome new members, and prompt open-ended questions of your own!
Tip #2: Poll Your Facebook Group for Feedback
Keeping a finger on the pulse of your community is always a good idea, and sharing a poll in your Facebook Group is a great way to do this.
You could use polls to ask group members what they’re enjoying and what they’d like to see more of in the group.
Alternatively, you can use Facebook Groups to gain valuable feedback for your products or brand. For example, the founders of the podcast The Morning Toast created the Toast After Dark Facebook Group especially to gather content suggestions for their upcoming shows:

Tip #3: Create Community Groups for Different Locations
If your brand has strong communities in specific cities, consider creating localized Facebook Groups for them to interact.
Fitness apparel brand lululemon has community groups for different cities, with their lululemon Membership Chicago group attracting over 1,800 members and counting.
By creating city-specific communities, lululemon has a better understanding of what resonates with their customers in different cities. This allows them to share hyper-local sales, events, and news.
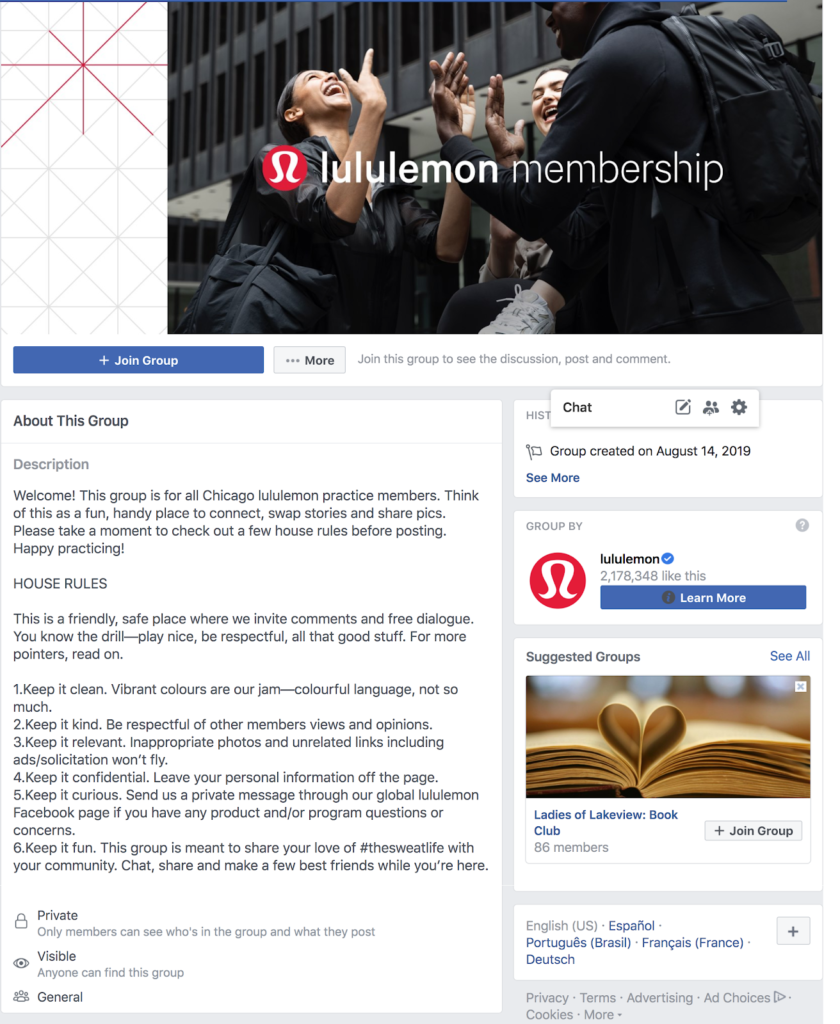
What’s more, by bringing their Chicago-based group members together and building relationships, lululemon is transcending beyond just a physical goods provider — which is a powerful way to strengthen brand loyalty and affinity.
Tip #4: Create Exclusive Content for Your Group
Keep your Facebook Group members engaged by creating content that they won’t see anywhere else.
This element of exclusivity will boost the value of the group and make it feel much more significant for members.
For example, you could offer early bird promotions, or even share exclusive Facebook Lives.
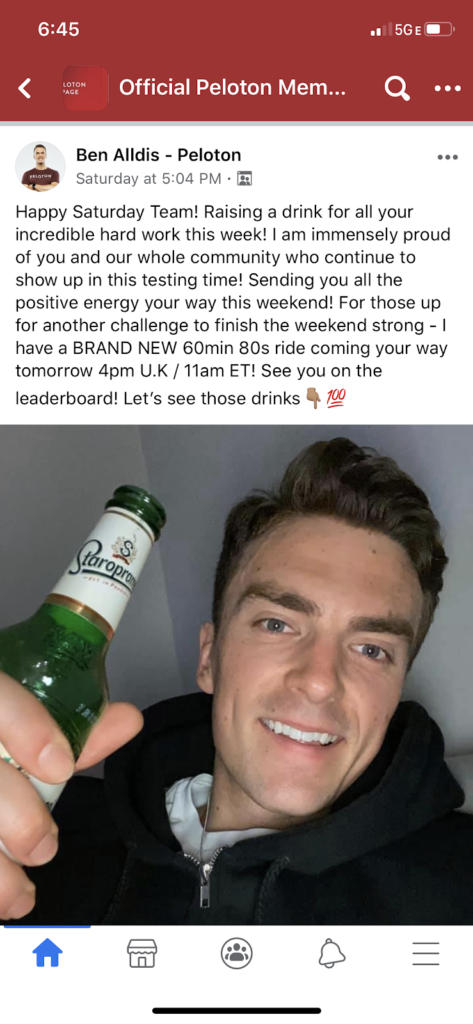
Peloton does a great job with this in their Official Peloton Member group, which regularly has instructors posting exclusive fitness content:
Tip #5: Encourage and Collect User-generated Content
Once a community is established on your Facebook Group, members may be willing to share their reviews and user-generated content with the group.
This can be a great way to drive awareness of your products or services, and third-party recommendations are a much more powerful way to influence purchasing decisions.
Request and encourage group members to share images with your products or their best experience related to your brand, or host a giveaway to encourage more content.
Be sure to comment and reply to their posts, and if they give you permission, use their content across your social channels.
Tip #6: Ensure Your Facebook Group is Always a Positive Space
Your Facebook Group is likely to attract members who are mainly fun, interesting, engaging, and kind!
However, sometimes you’ll get an individual who violates your group rules. To make sure the experience for all group members remains positive, it’s up to you and your moderators/admins to keep a safe and enjoyable atmosphere.
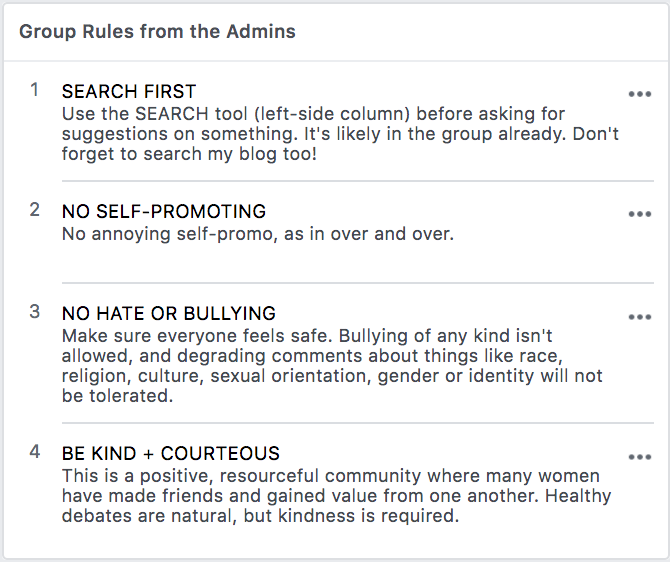
First, make sure your rules/conduct guidelines are clearly posted in the group description (You can even pin them to the top of your group). Next, If someone is causing issues within your group, you can use the administrator tools to temporarily disable a member from interacting, such as posting or leaving comments.
If things get really out of hand, you can also permanently remove members who are dishonoring the rules and peace of your group.
Facebook Groups are a powerful tool for creating community and meaningful interactions with your audience.
Will you be creating a Facebook Group for your brand? Let us know in the comments!
Did you know you can plan, schedule, and auto-publish to Facebook, Instagram, Pinterest, and Twitter with Later — for free!
Join over 1 million marketers to get social news, trends, and tips right to your inbox!
Email Address